Showing posts with label Technology. Show all posts
Tagged under:

Redirect Custom Confirmation Page for Google Forms


Add a bit of javascript* to redirect the completed page to a confirmation page** of your choosing:

REPLACE:

<form action="YOUR-EMBEDDED-GOOGLE-SPREADSHEET-LINK" method="POST">


WITH:

<script type="text/javascript">var submitted=false;</script>
<iframe name="hidden_iframe" id="hidden_iframe"
style="display:none;" onload="if(submitted)
{window.location='http://YOUR-THANK-YOU-PAGE-URL';}"></iframe>
<form action="YOUR-EMBEDDED-GOOGLE-SPREADSHEET-LINK" method="post"
target="hidden_iframe" onsubmit="submitted=true;">


*The re-direct script will not work if you have required fields in your form.


Now your custom designed google forms will be redirected to your custom designed confirmation page.
Tagged under: ,

7 Facts You Need To Know About Abdul Kalam Island


India's Most Advanced Missile Testing Site


One of India's key missile testing facilities - Wheeler Island - located off the coast of Odisha, will be named after President APJ Abdul Kalam, whose death in July this year triggered a nationwide outpouring of grief, the government has said.

Where is it ?
10 kilometers off the Odisha coast on the Bay of Bengal. The Island, which is about 2 kilometers in length and 390 acres.

A legacy of missile testing ::
It is India's most advanced missile testing site in the Bay of Bengal should now be named 'Kalam Island'. The missiles which were launched from the Wheeler Island include Akash, Agni, Astra, BrahMos, Nirbhay, Prahaar, Prithvi, Shaurya and Advanced Air Defence, and Prithvi Air Defence.

Kalam had requested the Ministry of Defence for the island ::
Remembering Kalam's association with Odisha and the Island, Odisha Chief Minister Naveen said Kalam was working at Defence Research and Development Organization, Balasore for pretty long. "It was Biju Babu (Biju Patnaik), who allotted the historic Wheeler Island to the ministry of defence on the request of Dr Kalam in 1993," Naveen added.

Missiles and Poems ::
It was there that Kalam tested scores of missiles. The quiet sea washed sylvan surroundings also gave him inspiration to write many poems for his book "My Journey".

Kalam's Theatre of Action ::
As the man pioneering missile development in India, he himself described the Wheeler Island as his 'theater of action'. The first successful land-to-land test of the Prithvi Missile was conducted from the mainland and it landed on the then uninhabited 'Wheeler Island' on November 30, 1993.

Who was Wheeler?
The island was named after an English commandant Lieutenant Wheeler. "It is high time we need to call it Kalam Island since it is a one-of-its-kind hi-tech facility in India and it was actually spotted and built from scratch by Kalam," asserts V K Saraswat, member of the National Institution for Transforming India (NITI Aayog) had commented in August 2015.
Saraswat was Kalam's associate for 35 years as a missile scientist and then rose to be the Director General of the Defence Research and Development Organisation (DRDO). In 1993, it was Saraswat and his co-worker S K Salwan who as scientists were the first to set foot on the 'Wheeler Island' when Kalam instructed them to look for these uninhabited islands that he had initially spotted on the naval hydrographic maps.

Humble beginnings ::

Saraswat recalls those sultry day in 1993 when he hired a boat for Rs 250 and then got lost in the Bay of Bengal and had to spend the night on the Wheeler Island itself surviving on bananas. The islands were not visible from the mainland. In his book "Ignited Minds: Unleashing the Power Within India", Kalam writes "to their surprise they (Saraswat & Salwan) found a Bangladeshi flag flying atop a tree, as the island may have been frequented by fishermen from the neighboring country. My friends quickly removed the flag".


Courtesy: Defense News
Tagged under: ,

GSAT-6A's big antenna deployed by ISRO


While every channel was busy in covering News about Sheena Bora Murder Story. ISRO on August 27th 2015 successfully Launched GSLV-D6 carrying GSAT-6. Only few news papers found few space to publish this in their News Papers. But the less-celebrated textbook launch of GSLV-D6 was by far one of the most significant moments in the history of India’s Geosynchronous Satellite Launch Vehicle (GSLV) programme.


Why GSAT-6A is so important to India?

ISRO  said that it had deployed the S-Band Unfurlable Antenna of six metre diameter successfully.The satellite was launched by ISRO's heavy rocket Geosynchronous Satellite Launch Vehicle-Mark II (GSLV) and was successfully placed into geo transfer orbit (GTO) on Thursday.One of the advanced features of GSAT-6 satellite is its S-Band Unfurl able Antenna of six meter diameter - the largest satellite antenna released by ISRO. "This antenna is utilized for five spot beams over the Indian mainland, which exploit the frequency reuse scheme to increase frequency spectrum utilization efficiency," said ISRO.

What was the message to World?

India has built and validated a perfectly working cryogenic engine. And the highly complicated engine has delivered a perfect performance on flight not once but twice (GSLV-D6 was the second successful launch using the indigenously developed cryogenic engine after the January 2014 launch). This, despite sanctions and restrictions (on transfer of dual use technologies) thrown at the Indian Space Research Organisation (ISRO) by developed nations who were clearly not comfortable with the idea of another player entering their select grouping that had the capability to launch heavy communication satellites.

What makes developed nations worry?

Space agencies of developed nations have reason to be worried about Indian space programme in general and GSLV’s success in particular. Consider this: It cost ISRO $36 million to put GSAT-6 using GSLV-D6 in orbit. This is far lower than the $60 million cost that the European Space Agency’s Ariane 5 entails. ISRO says it is now ready to launch commercial satellites weighing up to 2.2 tonne.

Why do others can start preferring ISRO?

ISRO has to keep launching more GSLVs to establish the reliability of the launch vehicle. Its customers who are investing multi-million dollars in building advanced satellites are not going to hand over them to ISRO simply on the basis of lower cost. Reliability is the key in this business and it comes from repeated textbook launches. If ISRO’s smaller launch vehicle PSLV (Polar Satellite Launch Vehicle) is attracting orders in droves it is because it has been in service for 20 years and has had 29 continuous successful launches.

What's next by ISRO?

The next real technology leap for ISRO is GSLV Mark III which will have the capability to put satellites weighing 5 tonne in orbit. It is a much larger vehicle weighing 640 tonne (GSLV-D6 in comparison weighed 416 tonne). ISRO is developing a bigger cryogenic engine for this vehicle and it has now been tested for 800 seconds. If GSLV Mark III succeeds, India will gain the capability to launch any communication satellites in the world. GSLV-D6’s success gives the confidence that it is only a matter of time before that will happen too.
Tagged under:

Upgrade your PC freely to Windows 10


If you need to install or reinstall Windows 10, you can use the tools on this page to create your own installation media using either a USB flash drive or a DVD.

Before you begin

  • Make sure you have:
    • An internet connection (internet service provider fees may apply).
    • Sufficient data storage available on a computer, USB or external drive for the download.
    • A blank USB or DVD (and DVD burner) with at least 4 GB of space if you want to create media. We recommend using a blank USB or blank DVD, because any content on it will be deleted.
  • Read the System Requirements.
  • If you will be installing the operating system for the first time, you will need your Windows product key (xxxxx-xxxxx-xxxxx-xxxxx-xxxxx). For more information about product keys and when they are required, visit the FAQ page.   
Use the media creation tool to download Windows. This tool provides the best download experience for customers running Windows 7, 8.1 and 10. To learn how to use the tool, go to the Installing Windows 10 using the media creation tool page. Tool includes:
  • File formats optimized for download speed.
  • Built in media creation options for USBs and DVDs.
  • Optional conversion to ISO file format.
If you’re on an Enterprise edition, the media creation tool won’t work for an upgrade. Please see the Volume Licensing Service Center for more information.
 

Download Tool Now (64 Bit Version)

Note: This tool can be used only for Genuine version of Windows. 
Tagged under: ,

Average Indian browse 11 times Slower Speed than a South Korean


Its shocking harder truth that an average Indian browse at a speed of 2 Mbps. While only 1.1 % users have above 10 Mbps connection and only 7.8% users have greater than 4 Mbps connection. We just rank 116 in Global Rank in Internet Connection Speed, with average annual growth at 54% year-over-year. While even our neighbours like China, Vietnam rank 82, 99 in Global Ranks. While Indian Prime Minister office was 34 Mbps connection by 2015, but no reflection in rest of India. The peak internet speed by an individual is just 14Mbps.

While an average South Korean browses at speed of 22 Mbps. South Korea ranking No.1 in Global Rank at internet connection speed. They now entered in 5G network. While India is struggling to reach its 3G network all over India. Still Europe ranks in high speed mobile connections by providing highest at 16Mbps. India is still providing average mobile speed of 1.9 Mbps. New initiatives like Internet.org expected to provide free internet connection throughout India. Long way towards growth India.. Common India you can improve wisely..
Tagged under:

Best Innovative Mobile App of Month

Innovation matters in our day today activities.. Hereafter every month we will be getting you through one best innovative app that actually helps in your day to day life.

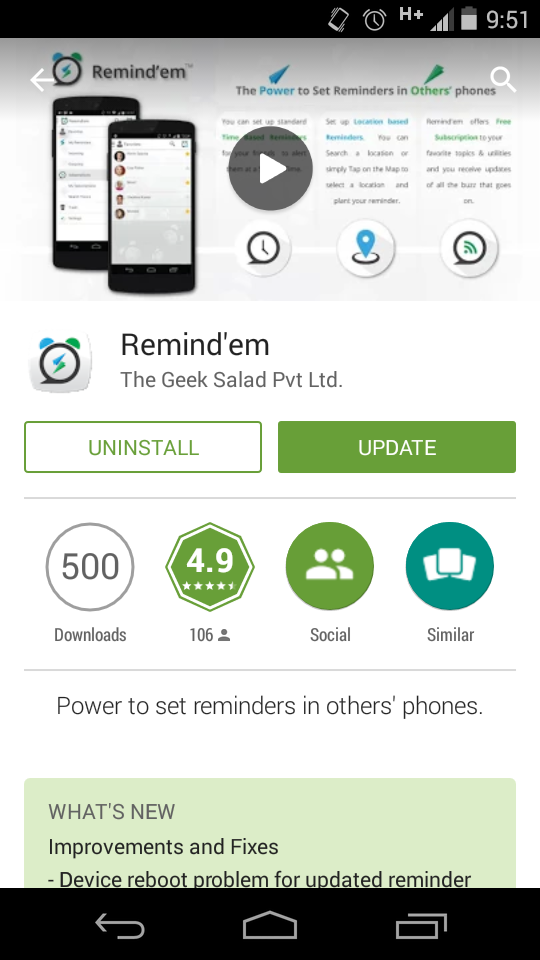
Everyone even me and you needs to remind our friend of something and sometimes we our self forget to remind him or our friend forgets what we said him. So its better we depend on our gadgets to keep reminder for our self. Have you ever thought of keeping reminder for your friends?? Do you think you have a app for it? Yes, Now you can set reminder for your friends too. All you need is install Remind'em in your phone and make your friend install it.


That's it you are done. Its awesome right? Even if you forget it after a week about the topic you just spoke about, the app reminds you and your friend. More interesting feature the app have is location reminder, i.e. if u set an reminder at particular location whenever your friend or you go at that particular place it automatically reminds you. All you need is a smartphone with you. Download and enjoy the app. Currently that app supports only in android devices. Hope the developer launches it in other OS too :)

Download via Playstore

Tagged under:

Saveetha University App for Smart Phones

Now App is available for Android & HTML 5 Version.
     Till now there is no official app for Saveetha University Portal. We already published basic sinking app created by Saveetha School Of Engineering Students for Saveetha Portal. That app is launched only for android. Now stable version of android and HTML 5 Version for IPhone, Blackberry, Windows mobiles is available. Two Versions of Android is Available a  Version-2 Size 11 MB (added features with ads) and Version-1 Size 1.51 MB (only portal without ads)  . Lite Version is only for Saveetha Portal users. This app is just an initiative for Saveetha University Students to create an app for Saveetha Portal.

How to Install in Android Devices?
1. Download the APK file from the direct link.
2. Make sure you have enabled to install third party Applications.
3. Open the file and click Install Application.
4. Since it is an third party application it may be prompted as unwanted file by few Anti-Virus Applications, just Ignore it and install the app.
5. That's it you have successfully installed the Application.

We will be soon uploading in Playstore and Amazon.

Other Smart Phones
     For other Smart Phones HTML 5 version is available u can use the same interface as mobile accessible webpage bookmark this page and use it.

Downloads

Version 1 Apk (1.51 MB) (Without Ads)
Version 2 Apk (11 MB) (With Ads)


Other Smart Phones Click Here


Android Users can use this Barcode to download the App.


For any suggestions please comment below.
Enjoy using this app :)

Tagged under:

Saveetha University Portal Android App

Till now there is no official app for Saveetha University Portal. A Sinking app created by Saveetha School Of Engineering Students for Saveetha Portal is available. Though this app is very basic it is expected that these students will be launching full fledged app soon. Until that you can use this free sinking app for your convenience. This app is just an initiative for Saveetha University Students to create an app for Saveetha Portal.

You can download this app by clicking here.
1.Direct Download Link 1
2.Direct Download Link 2

How to Install?
1. Download the APK file from the direct link.
2. Make sure you have enabled to install third party Applications.
3. Open the file and click Install Application.
4. Since it is an third party application it may be prompted as Unwanted file by few AntiVirus Applications, just Ignore it and install the app.
5. Thats it you have successfully installed the Application.

If you have any developed applications by your own for this portal please mention it in below comments so that it may be useful for others.


Tagged under:

Best Budget Phones (₹10000 - ₹15000)

Thinking to buy a Phone of range ₹10000-15000 and are you in a confusion to buy which Phone for a Smart Price??

We will give you the small review about the Best Phones ranging around that price by the end of third quarter of this year 2014.

Moto G (2nd Generation) (Best Buy : ₹13,000)


The first Phone comes to our mind when we think about Budget Phones around ₹10,000.  With 1.2 GHZ Qualcomm Snapdragon 400, Quad Core Processor, the phone runs smoothly. Interestingly having 1 GB RAM and 16GB Internal Memory allowing to instal and play almost all High Definition Games. It also supports USB Connectivity. Other salient features are both GPS and GLONASS navigation systems are inbuilt, Dual Sim, 8MP Primary Camera with LED etc. Best advantage of going behind Moto is its first OS update preference and long life of mobile.


BlackBerry Z3 (Black, with 8 GB) (Best Buy : ₹14,400)


When we think about Blackberry we think about privacy and its salient encryption features. The BlackBerry Z3 packs a 1.2 GHz dual core processor and 1.5 GB of RAM. So, here is a Blackberry device that processes tasks efficiently and is capable of speedy multitasking. The BlackBerry Z3 runs on the BlackBerry 10.2.1 operating system. This new BlackBerry OS has opened the doors to Android apps. Providing 3G connectivity.


Lenovo S850 (Best Buy: ₹13,600)


When we think about Lenovo handsets battery back up is the first think comes to our mind. yes this phone also provide amazing battery back up that allows you to have up to 13 hours of talk time on 2G networks. Additional Features of Lenovo Logo LED Notification, Dual SIM and 13 MP Primary Camera. With 1.3 Ghz Quad Core Processor and  Internal memory of 16GB and 1GB RAM this phone also stands out in market for its unique Feature.


Sony Xperia SP (Best Buy: ₹ 15,000)


When we think about Sony we think about its Stylish Design and Unique Camera Clarity.With exquisite craftsmanship and sleek a bezel, this smartphone makes a classy fashion statement. Exmor RS™, an image sensor technology with BSI light sensor. It aims at noise reduction and works beautifully in dim-light conditions. This phone comes loaded with powerful Qualcomm® Snapdragon™ S4 Pro processor, a dual core processor that is ideal for an HD smartphone. Other salient features are both GPS and GLONASS navigation systems are inbuilt  and  Internal memory of 8GB and 1GB RAM


Xolo Q3000 (Best Buy: ₹ 14,800)


One of the emerging mobile phones with good battery back up. This phone gives extraordinary feature of 1.5 Ghz Quad core Turbo Processor with 2GB RAM and 16GB Internal Memory provides amazing Gaming Experience and Speed. It also provides OTG support. Additional Features provides 13 MP primary camera and a battery backup of  33hrs talk time in 2G and 21hrs talk time in 3G .


Micromax Canvas Knight Cameo A290 (Best Buy: ₹11,000)


When think about Micromax we think about quality mobile phones at cheaper price. This Dual SIM phone as Salient Features such as 1.4 GHz MT6592M Octa Core Processor with 1GB RAM and 8GB Internal Memory. This mobile also have FM Radio where most of the SmartPhones are failing to provide. With 8 MP primary Camera this phone is descent for its price.


Alcatel Onetouch Idol X+ (Best Buy: ₹15,000.)


Though Alcatel is a new emerging company in Indian markets, what makes us to turn heads towards it is its configuration for its price. They provide 2Ghz processor with 2GB RAM and 12.3GB Internal Memory. With 13 MP primary Camera and 27hrs of 2G battery back up , 16hrs of 3G battery backup.


Karbonn Titanium S9 (Best Buy: ₹14,500)


The phone boasts of a 1.2 GHz Quad Core processor backed by 1 GB RAM to ensure that graphics are enriched and multitasking speeds are amped up by several shades. The massive 13 megapixel camera that the Titanium S9 sports and a 5 megapixel secondary camera to ensure that selfies look perfect from now on. This phone comes with a in-built memory of 16GB.

Tagged under:

Remove Subscribe to Atom links from your Blogger Blog Completely


I have already posted how to remove Subscribe to atom link in homepage of the Blogger in my past post. Click Here to move to that post.

If you want to remove the Subscribe to Atom link Completely then follow the below procedures..

Step 1: Go to your dashboard.

Step 2: Select template --> Edit HTML.

Step 3: Find the following links using (Ctrl+F) option and delete it.

<div class='feed-links'>
<data:feedLinksMsg/>
<b:loop values='data:links' var='f'>
<a class='feed-link' expr:href='data:f.url' expr:type='data:f.mimeType' target='_blank'><data:f.name/> (<data:f.feedType/>)</a>
</b:loop>
</div>

Save your template. Thats it you are done :)
Tagged under:

Install and Use Indian Rupee Symbol in Windows (Step by Step)

Here is the simple method to install ₹ in your Windows Operating System.

Step 1: First you need to download this update from windows website and you need administrator privilege to do this in your computer. Download KB2496898 windows update.

Step 2: Install the update you have downloaded by double clicking it. If prompted for administrator permissions click OK.

Step 3: Go to Control Panel --> Region and Language --> Keyboards and Languages. You will find like below after you opened the tab.


Step 4: Select "Change keyboards.."

Step 5: Under the General Tab , choose "add" option.


Step 6: Scroll and find "English (India)". Click + to expand and select Keyboard option --> Show More--> India

Step 7: Make sure in "Other" option "Ink Correction" is ticked.


Step 8: Select Ok


Step 9: Make sure you change default input language as English (India)-India and click OK.

Step 10: Use Ctrl + Right Alt + 4 to get ₹ Symbol. 

(Remember to use "Ctrl" and "Right Alt", not the left Alt key and 4 key, not the number pad 4.)
Tagged under:

Display Gadgets only in Home Page in Blogger


This article is about how to set up a gadget / widget in Blogger so that it is only visible on the first place that a reader sees when they visit your blog (often called the "home page")

Step 1: Go to “Template” in Dashboard  and choose “Edit Html” Option.

Step 2:    Find the Gadget-Id  by pressing “Ctrl+F” keys and search the gadget name.

Step 3: Find the code for your gadget:
Example:
 <b:section class='main' id='main' showaddelement='no'>
<b:widget id='Text1' locked='false' title='Test gadget' type='Text'/>
<b:widget id='Blog1' locked='true' title='Blog Posts' type='Blog'/>

Step 4: Click on the Expand Widget Templates checkbox (so it's turned on)
After the expanded template, find the widget name again.  This time it will look a bit longer (the exact details depend on what type of widget/gadget it is.)
 <b:section class='main' id='main' showaddelement='no'>
<b:widget id='Text1' locked='false' title='Test gadget' type='Text'>
<b:includable id='main'>
  <!-- only display title if it's non-empty -->
  <b:if cond='data:title != &quot;&quot;'>
  <h2 class='title'><data:title/></h2>
  </b:if>
  <div class='widget-content'>
  <data:content/>
  </div>
<b:include name='quickedit'/>
</b:includable>
</b:widget>
<b:widget id='Blog1' locked='true' title='Blog Posts' type='Blog'>

Step 5:  Add conditional formatting
You need to put conditional formatting code around the code for the gadget - makings sure that it doesn't go around the code for anything else!  (which is why you noted what comes afterwards in step

Copy and pAste this code below this line  <b:includable id='main'>

The code to use is this.  

<b:if cond='data:blog.url == data:blog.homepageUrl'>

and close this code by </b:if>

Thats it Enjoy :)

Tagged under:

Remove Home link and box from Blogger template


In the footer of Blogger template, there is a home page link. Usage of that link is very rare. We can remove this link by a simple template edit. The home link in the footer of blogger template is usually not useful because it is not in a important position. We can change the position of the link or remove that link from the template, if we want.
Previously Google had limits in number of links on a page. Now they lifted this limitation. But the home link is appearing more than once in a page. It is better to avoid duplicate links which are not relevant.
How to remove this link
Go to Template and Edit HTML, Tick on Expand Widget Templates.(#) (#) (#) (#)
Find the following code in the template using Find option.(#)
<a class='home-link' expr:href='data:blog.homepageUrl'><data:homeMsg/></a>
Delete and Save the template and verify the blog.

How to remove the home box
Some blogger templates contain a box with the home link and most of the readers are desperate to delete that too. I suggested to delete the box using some code, But I think it is impossible to delete that box, instead you can hide the box using the CSS trick.
Please find </head> in your template


Add following code just above the head tag.

<style type="text/css">
/* hiding home box link */
#blog-pager{display:none !important;}
</style>

So it will look like this
<style type="text/css">
/* hiding home box link */
#blog-pager{display:none !important;}
</style>
</head>
Save the template, you are done.
Tagged under:

Automatically move Daily Mails to Respective Folders in Outlook

If you subscribe to daily email news letters they can quickly fill up an inbox.  You might want to save them to read or reference at a later time.  Keeping these emails in specific folders is a good way to keep organized.  Today we will take a look at how to create a rule in Outlook to automatically place regularly received email messages in specifically assigned folders.

First right click on the email message you want to move to automatically move to a folder and select Create Rule.

This will open up the Create Rule screen so we can choose the conditions for this email.  Depending upon how you have your mail set up (Exchange, Gmail, etc) will determine what to select for the conditions.  Most of the time I set the rule by sender to one of my email addresses.  Also, you can add visual and sound notifications.  After you have selected the conditions the next thing to click is “Move the item to folder”.

Now browse the folder location you want the email to be sent to or create a new one.
Click OK in the Create Rule window then OK on the following confirmation dialog box.  That’s it, now all daily emails will be sent to a specific folder.


This is just one of many helpful rules you can create in Outlook to stay organized.
Tagged under:

How to Reset Outlook 2010?


I will say a simple method to reset your Outlook 2010 version. I don't know whether it works with other version of Outlook. Please Check it.

Steps:

1. Close Outlook
2. Go to Control Panel and locate the mail icon. (View by Large Icons view)
3. Click show profiles.
4. Delete the profile.
5. Create a new profile (it doesn't matter what you call it.)


After you create a new profile and go into Outlook, it will take you through the wizard again and you can choose what kind of email account you want to setup (pop3, Exchange, etc.)

Hope it helped you :) Kindly contact me if you have any problems with doing in it.
Tagged under:

Show Only Post Title On Home Page In Blogger


Have you tried many methods to Show Only Post Title On Home Page in your blog?

I will say you simple html hack to remove the gadget from your blog. Just follow the simple instructions given below.

Step1: Log in to you Blogger ID

Step2: Go to Dashboard.

Step3: Choose Template.

Step4: Click Edit Html.

Step5: Inside the Code area, press Ctrl+F to open Blogger Search Box.

Step6: Type </head>  inside search box and press enter.

Step 7: Just above </head> add this code:

<style type='text/css'>

<b:if cond='data:blog.url == data:blog.homepageUrl'>

.post {
margin:.5em 0 1.5em;
border-bottom:0px dotted $bordercolor;
padding-bottom:1.0em;
height:50px;
}
.post h3 {
margin:.25em 0 0;
padding:0 0 4px;
font-size:20px;
font-family:Tahoma,Georgia,Century gothic,Arial,sans-serif;
font-weight:normal;
line-height:1.4em;
color:#cc6600;
}

.post h3 a, .post h3 a:visited, .post h3 strong {
display:block;
text-decoration:none;
color:#cc6600;
font-weight:normal;
}

.post h3 strong, .post h3 a:hover {color:#333333;}

.post-body {display:none;}
.post-footer {display:none;}
.comment-link {display:none;}
.post img {display:none;}
.post blockquote {display:none;}
.post blockquote p {display:none;}
h2.date-header {display:none;}
.post-labels {display:none;}
.post-rating {display:none;}

</b:if>

</style>

Step 8: Click Save Template to save the changes you have made.

Thats it you have done :)
Tagged under:

Remove Subscribe to : Posts (Atom) Link in your Blog


Have you tried many methods to remove "Subscribe to : Posts (Atom) Link" in your blog?

I will say you simple html hack to remove the gadget from your blog. Just follow the simple instructions given below.

Step1: Log in to you Blogger ID

Step2: Go to Dashboard.

Step3: Choose Template.

Step4: Click Edit Html.

Step5: Inside the Code area, press Ctrl+F to open Blogger Search Box.

Step6: Type <b:include data='feedLinks' name='feedLinksBody'/> inside search box and press enter.

Step 7: Just remove this Command.

Step 8: Click Save Template to save the changes you have made.

Thats it you have done :)
Tagged under:

Remove "Powered by Blogger" in your Blog


Have you tried many methods to remove "Powered by Blogger" in your blog?

I will say you simple html hack to remove the gadget from your blog. Just follow the simple instructions given below.

Step1: Log in to you Blogger ID

Step2: Go to Dashboard.

Step3: Choose Template.

Step4: Click Edit Html.

Step5: Inside the Code area, press Ctrl+F to open Blogger Search Box.

Step6: Type </head>  inside search box and press enter.

Step 7: Just above </head> add this code:

            <style>
            #Attribution1 { 
            display: none;
            }
            </style>

Step 8: Click Save Template to save the changes you have made.

Thats it you have done :)
Tagged under:

How to create a bootable Windows USB drive.

Why a bootable USB Flash Drive?

A common use of a bootable USB flash drive is to use it for booting into Windows. This can allow you to perform diagnostics on a computer that has hardware issues or can't boot into Windows. You can also use the flash drive to install Windows, instead of using the Windows installation CD.

Note: To determine if a computer is capable of booting to a USB device, access the computer's BIOS and check the bootable device list. If a USB device is listed, set the USB drive to be the first boot device. If you do not see a USB device in the list of bootable devices, your BIOS is not capable of booting to a USB device. (NOTE: You may need to have your USB flash drive plugged in when you access the BIOS).

Easy Method:

There are quite difficult methods to make a bootable USB Flash Drive and i will say you a simple method to make bootable USB Flash Drive.

1. First you need to download Zotac.

2.The software compatibility:
 - Windows XP or higher with .NET Framework 4.0 installed.
- Capable to transfer Windows Vista or higher to any removable device.

3.Install the Software Zotac in your PC.

4.Run The Zotac as administrator.

5.Click "Setup to USB" and drag the USB drive in to it.

6.Then select the ISO file or Folder which contains the Windows OS.

7.Select start and wait for the Transfer status to complete.

8. Now your OS in the Pen drive is USB Bootable.

9. When you restart your Computer select boot Options by using F keys and select USB Drive for Booting :)

Note:  This method will format the pen drive so kindly take a back up of the pen drive before you use it.

Tagged under:

How to Recover files from Hard Disk/ Pen drive/ SD Card

Simple Software's worth full to download and recover your files.

1. If you want to completely restore your important files back, you should stop writing anything else on this USB drive, for any new data would actually erase your original data permanently.

2. Plunge this USB flash drive to your computer and choose a third-party data recovery tool to retrieve your deleted files.

There are plenty of data recovery tools out there. If you want to have much more security of data recovery, you could buy a paid data recovery tool. If you have no extra money for this, don’t worry, you also could download some data recovery freeware online:

3. Follow the instructions to retrieve your deleted files back.

4. Back up all your recovered data on a different drive in case of data loss.
Note: You are supposed to be more careful about your important data and remember to back it up all the time.
Good luck!